Getting Started With Beginner Composting: Simpler Than You Think
Beginner composting is easier than most people assume, requires very little equipment, and produces a genuinely useful product—finished compost—that improves garden soil, reduces the need for purchased fertilizers, and keeps organic waste out of the landfill. The science behind composting is simple: microorganisms break down organic material into a stable, nutrient-rich material that plants love. Getting started requires nothing more than a bin or a pile, a basic understanding of what goes in and what stays out, and a little patience.
Why Compost? The Benefits Beyond the Garden
Composting delivers value on multiple levels. In the garden, finished compost improves soil structure, increases water retention in sandy soils and drainage in clay soils, and provides a slow-release source of nutrients that reduces or eliminates the need for synthetic fertilizers. For the household, composting diverts food scraps and yard waste that would otherwise go to the landfill—where organic material decomposes anaerobically and produces methane, a potent greenhouse gas. The U.S. Environmental Protection Agency estimates that food waste accounts for roughly 24 percent of material in municipal solid waste landfills, making composting one of the most environmentally meaningful actions an individual household can take. The EPA’s composting at home guide is a comprehensive free resource for anyone starting out.
The Basic Science of Composting
Effective composting requires four inputs in roughly the right balance: carbon-rich materials, nitrogen-rich materials, moisture, and oxygen. Understanding these four inputs is the entire foundation of successful composting.
Carbon-Rich Materials (“Browns”)
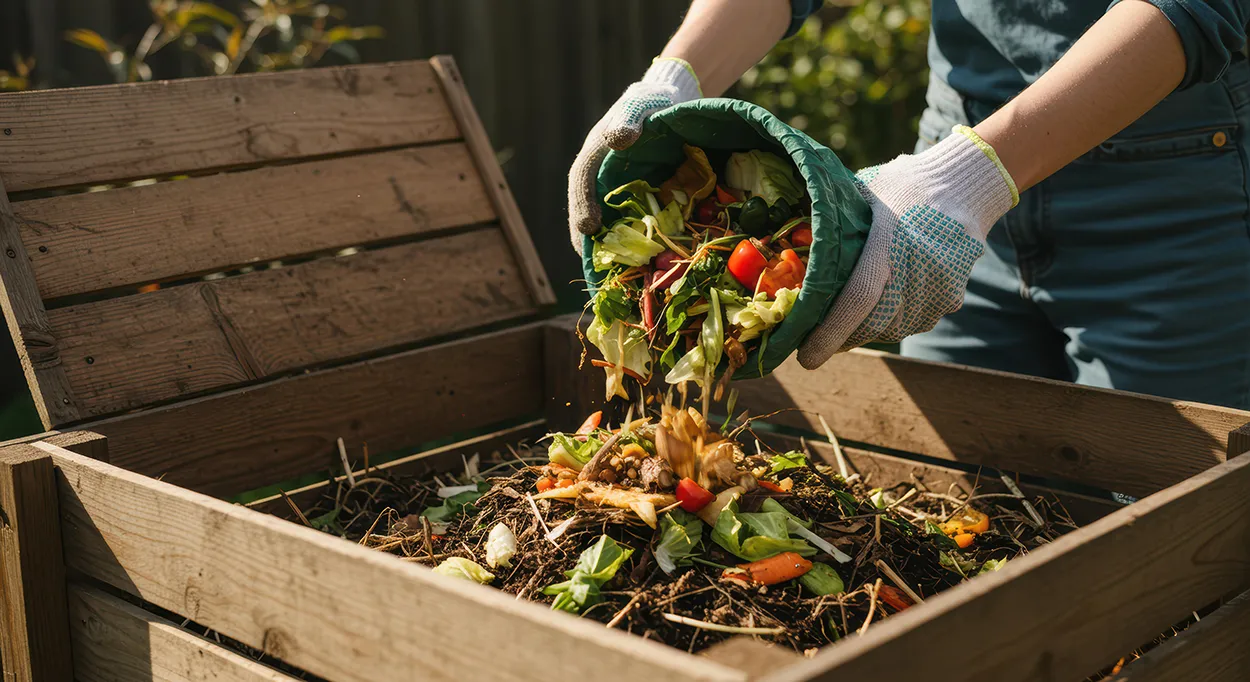
Browns provide structure and energy for the microorganisms doing the decomposition work. Common brown materials include:
- Dry leaves
- Cardboard and paper (torn into pieces, no glossy coatings)
- Straw and hay
- Wood chips and sawdust (from untreated wood)
- Paper bags and paper towels
- Dried plant stalks
Nitrogen-Rich Materials (“Greens”)
Greens provide protein and nutrients for microbial growth. Common green materials include:
- Fruit and vegetable scraps
- Coffee grounds and paper filters
- Tea bags (remove staples)
- Fresh grass clippings
- Fresh plant trimmings
- Eggshells (technically neutral but work well in compost piles)
The Carbon-to-Nitrogen Ratio
A rough ratio of 3 parts browns to 1 part greens by volume is a practical starting point for backyard composting. Too many greens without enough browns creates a wet, smelly, slow pile. Too many browns without greens creates a dry pile that barely decomposes. Adjusting based on what your pile looks and smells like is more practical than measuring precisely.
What Not to Compost
Some materials do not belong in a typical backyard compost pile:
- Meat, fish, and bones: Attract rodents and other pests and create serious odor problems
- Dairy products: Same pest and odor concerns as meat
- Oily or greasy food: Interferes with decomposition and attracts pests
- Pet waste: May contain pathogens that survive typical backyard composting temperatures
- Diseased plants: Pathogens may survive and spread to your garden when you apply the finished compost
- Treated wood products: May contain chemical preservatives that are toxic to plants and soil organisms
- Invasive weeds or weeds gone to seed: Unless your pile reliably reaches high enough temperatures to kill seeds, finished compost may spread weeds throughout your garden
Choosing a Composting Method
Open Pile
The simplest method: pile your materials in a corner of the yard at least three feet wide and three feet tall. No container required. Decomposition is slower than in an enclosed bin, and the pile is more susceptible to drying out. Best for households with large quantities of yard waste like leaves and grass clippings.
Enclosed Bin
A purchased or DIY enclosed compost bin retains heat and moisture, keeps pests out, and looks tidier than an open pile. Many municipalities offer subsidized compost bins through waste management programs—check your city or county’s website before purchasing one at full price. Enclosed bins work well for a mix of kitchen scraps and yard waste.
Tumbler
A rotating compost tumbler is mounted on a frame and can be spun to aerate the contents without manual turning. Tumblers heat up faster, decompose more quickly, and are more effective at excluding pests than open bins. They are more expensive upfront ($80 to $300) but are the most convenient option for households primarily composting kitchen scraps.
Vermicomposting
Vermicomposting uses red wiggler worms to break down food scraps in an indoor bin. It is ideal for apartments or homes without outdoor space, processes kitchen scraps quickly, and produces extremely high-quality finished compost (called worm castings). It requires managing worm population health and moisture levels but is straightforward once established.
Maintaining Your Compost Pile
Moisture
Your compost pile should feel about as moist as a wrung-out sponge—damp throughout but not dripping. In dry weather, sprinkle water on the pile when adding materials. In wet climates, a cover or roof over the pile prevents it from becoming waterlogged.
Aeration
Oxygen is required for aerobic decomposition. Turn your pile every one to two weeks with a pitchfork or compost aerator tool to introduce fresh oxygen, which speeds decomposition and prevents the anaerobic conditions that create unpleasant odors. Tumblers handle aeration simply by spinning.
Troubleshooting Common Problems
- Pile smells bad: Too much nitrogen (greens) or too wet—add more browns and turn the pile
- Pile is not decomposing: Too dry, too many browns, or not enough nitrogen—add water and green materials, then turn
- Pests are getting in: Do not add meat or dairy; use an enclosed bin with a lid; bury food scraps in the center of the pile
How to Know When Compost Is Finished
Finished compost no longer resembles the original materials. It is dark brown or nearly black, crumbly, uniform in texture, and smells like fresh earth—not rotting food. It should be cool to the touch throughout. If you can identify recognizable pieces of food or plant material, the compost is not finished and should be left for additional time. The University of Illinois Extension’s composting resource center provides detailed guidance on readiness assessment and how to use finished compost in different garden applications.
How to Use Finished Compost
- Garden beds: Work 2 to 4 inches of compost into the top 6 to 8 inches of soil before planting
- Lawn topdressing: Spread a thin layer (1/4 to 1/2 inch) over the lawn and rake it lightly into the grass—improves soil health and reduces the need for chemical fertilizers
- Mulch: Apply 2 to 3 inches of compost around garden plants to retain moisture and suppress weeds
- Potting mix amendment: Mix compost with potting soil at a 1:3 ratio for container gardens and raised beds
Conclusion
Beginner composting requires no special expertise, expensive equipment, or large outdoor space. Starting with a simple bin, a basic understanding of greens and browns, and regular turning is enough to produce high-quality finished compost in as little as two to three months. Beyond its garden benefits, composting is one of the most direct ways a household can reduce its contribution to landfill methane emissions. Start small—even collecting just coffee grounds and vegetable peels from your kitchen—and expand the system as you become comfortable with the process. The first batch of finished compost you work into your garden is its own reward.